 Just Fold Paper
Cut, fold & assemble
Folded Paper Wristwatch
Make a pretend wristwatch from one connected cross-shaped piece of paper. Fold four corners behind the face, bend the straps into a rectangular loop and tape their overlap. Drawn hands stay still: there is no working mechanism.
Preparation + 10 numbered steps
Materials
8 × 2-inch rectangle · 8 × 2 inches
One 8 × 2-inch rectangle (20.32 × 5.08 cm) of ordinary paper, ruler, pencil, scissors, a pen and one ¾ × ⅝-inch piece of removable tape. The prepared net remains one connected piece. The fixed demonstration loop has a 7½-inch perimeter; fit and durability are not tested. Do not force a tight loop onto a wrist.
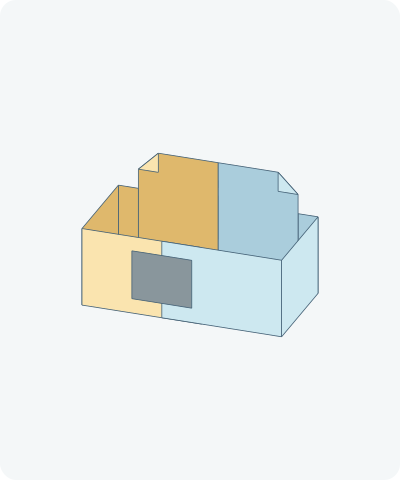
Drag to rotate · swipe sideways on touch.
Arrow keys rotate when focused.
Follow along
PreparationThe interactive guide needs JavaScript. Read every illustrated step below.
Help · controls & diagram
Play or drag the progress slider to watch a fold from 0% to 100%. Use the view buttons or drag the diagram to look from another angle.
Blue and gold identify the original left and right material halves, not required paper colors. Darker shades show the reverse. Orange highlights the moving paper. Dark dial marks are pen; the gray closure is separate tape.
With the diagram focused: Space plays or pauses, ←/→ change steps, and Home resets.
Every step, at a glance
Compare your paper with each diagram after completing the action. Blue and gold identify the original left and right material halves, not required paper colors. Darker shades show the reverse. Orange highlights the moving paper. Dark dial marks are pen; the gray closure is separate tape.
- 0. Cut and mark the cross net
- 1. Bevel the upper right corner
- 2. Bevel the upper left corner
- 3. Bevel the lower left corner
- 4. Bevel the lower right corner
- 5. Draw the pretend dial
- 6. Bend the right strap down
- 7. Return the right strap inward
- 8. Bend the left strap down
- 9. Overlap the ends underneath
- 10. Tape the closure and finish
PREPARATION · Original measured cross-net construction
Cut and mark the cross net
Start with an 8 × 2-inch rectangle, long edge horizontal. Mark a centered 2 × 2-inch square: its sides are 3 inches from either short end. On each 3-inch end section, mark ½ inch down from the top and ½ inch up from the bottom. Cut away the four 3 × ½-inch corner rectangles. Keep the central square and the two attached 3 × 1-inch straps. Mark strap fold lines 1¼ and 2½ inches left and right of the center.
Layers: One connected cross net; discard the four scraps before folding.
Check: The face is 2 inches square. Each strap is 1 inch wide and remains joined along a full 1-inch edge.
Explore this step ↑STEP 1 · Original measured cross-net construction
Bevel the upper right corner
On the face, mark ¼ inch along each edge from its upper right corner. Fold that small triangle behind on the diagonal joining the marks.
Layers: Only the small face corner moves; the strap stays flat.
Check: The first corner is clipped by a diagonal folded edge.
Explore this step ↑STEP 2 · Original measured cross-net construction
Bevel the upper left corner
Make the same quarter-inch marks at the upper left corner. Fold that triangle behind.
Layers: Move only this corner triangle.
Check: The two upper corners match.
Explore this step ↑STEP 3 · Original measured cross-net construction
Bevel the lower left corner
Mark ¼ inch from the lower left corner along both adjacent edges and fold the little triangle behind.
Layers: Keep the earlier folded corners closed.
Check: The third diagonal edge appears.
Explore this step ↑STEP 4 · Original measured cross-net construction
Bevel the lower right corner
Fold the last quarter-inch corner behind to match. Press all four corner creases.
Layers: Move the final corner only.
Check: The face is an octagon made by folding, with the straps still attached.
Explore this step ↑STEP 5 · Original measured cross-net construction
Draw the pretend dial
Keep the smooth face upward. Draw twelve short hour marks around the center, then a long hand pointing up and a shorter hand pointing right, as shown. You can choose another pretend time. These are pen marks, not additional paper pieces.
Layers: No paper moves. Draw on the smooth face, not the hidden corner flaps.
Check: The illustrated hands show three o’clock and cannot move.
Explore this step ↑STEP 6 · Original measured cross-net construction
Bend the right strap down
At the marked line 1¼ inches right of the center, bend the whole right strap away from the dial by a quarter turn. Hold the face level.
Layers: Carry all paper beyond this line.
Check: The right strap hangs at a right angle below the face.
Explore this step ↑STEP 7 · Original measured cross-net construction
Return the right strap inward
Use the next marked line, originally 2½ inches right of center. It is now 1¼ inches down the hanging strap. Fold the remaining end a quarter turn inward under the face.
Layers: Move the outer 1½-inch end only; keep the vertical side still.
Check: The right end lies parallel to the face, 1¼ inches below it.
Explore this step ↑STEP 8 · Original measured cross-net construction
Bend the left strap down
Bend the left strap away from the face on its line 1¼ inches left of center. Stop at a right angle.
Layers: Move the entire left strap beyond that line; leave the right strap still.
Check: Two vertical sides hang below the level dial.
Explore this step ↑STEP 9 · Original measured cross-net construction
Overlap the ends underneath
At the remaining left mark, fold the outer 1½-inch end inward. Bring it up against the outside underside of the right end, not through or into a pocket. The ends overlap by ½ inch.
Layers: Move only the left outer end. It approaches from below the stationary right end.
Check: A rectangular strap loop surrounds an open space; the left free edge rests underneath the right end.
Explore this step ↑STEP 10 · Original measured cross-net construction
Tape the closure and finish
Hold the overlap. Place the ¾ × ⅝-inch tape piece across the left end’s exposed free edge on the outside underside of the band: half its length on the left end and half on the visible right end. Press it down. To try the pretend watch, peel the tape back, open this last fold, place the face loosely over a wrist, then reclose only if comfortable. Peel the tape to remove it; never force your hand through the closed loop.
Layers: Tape is a separate fastener; do not tape paper to skin. Keep the paper overlap intact.
Check: The shaped face and closed strap form one complete pretend watch. If the fixed size does not fit, use it as a display model.
Explore this step ↑
Sources & notes
Just Fold Paper, Original cross-net pretend wristwatch (2026).
The cross-net dimensions, fold sequence, instructions, diagrams and code were authored for this guide. No external tutorial, photograph or diagram was copied. This is an original teaching construction, not a claim to have invented paper watches or a statement that commonplace folds are exclusive.
Adaptation: A single cut cross net has a 2-inch square face and two integral 3 × 1-inch straps. Four quarter-inch corner folds shape the face. Strap hinges 1¼ and 2½ inches from the center make a 2½ × 1¼-inch rectangular loop with a ½-inch overlap underneath; removable tape bridges the outer free edge. It is not a fold-only origami watch, a working clock, or a tested wearable product.
Original instructions and diagrams, made with AI assistance. About & reuse
Accuracy notes
Real-paper follow-along and paper weight have not been tested. Diagrams illustrate the sequence, not paper thickness, contact, collisions or exact layer visibility. The prepared 10-square-inch cross net is one connected material domain. Rigid hinges retain its material area, lengths and shared seams. The four removed 3 × ½-inch scraps are preparation waste, not disappearing folding material. Tape and drawn marks are separate from the paper sampler. Zero-thickness diagrams show the final left strap approaching below the right strap, then tape approaching the outside overlap. They do not simulate thickness, adhesive strength or skin contact. Real-paper folding, wrist fit and wear durability have not been tested.