 Just Fold Paper
Fold & glue
Paper Wallet
Make two separate top-opening pockets, then fold the holder like a book. Each pocket takes a bill folded in half; the center glue seam keeps the two compartments separate.
Preparation + 8 numbered steps
Materials
8 × 6.5-inch rectangle · 8 × 6.5 inches
One prepared 8 × 6.5-inch rectangle (20.32 × 16.51 cm) of ordinary paper, a ruler, pencil and paper glue. If preparing it from a larger sheet, use scissors. Keep bills out until the glue is completely dry.
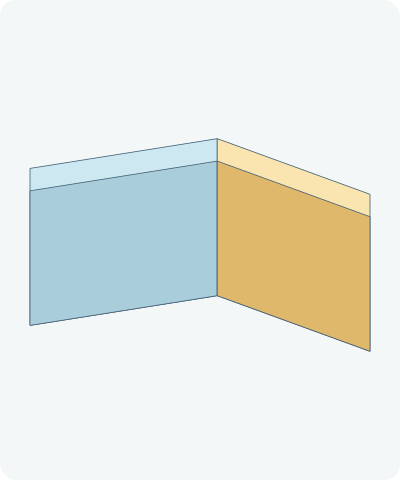
Drag to rotate · swipe sideways on touch.
Arrow keys rotate when focused.
Follow along
PreparationThe interactive guide needs JavaScript. Read every illustrated step below.
Help · controls & diagram
Play or drag the progress slider to watch a fold from 0% to 100%. Use the view buttons or drag the diagram to look from another angle.
Blue and gold identify the original left and right halves of the sheet. Orange shows the moving paper. The three hatched bands in the glue map are adhesive, not cuts or extra paper.
With the diagram focused: Space plays or pauses, ←/→ change steps, and Home resets.
Every step, at a glance
Compare your paper with each diagram after completing the action. Blue and gold identify the original left and right halves of the sheet. Orange shows the moving paper. The three hatched bands in the glue map are adhesive, not cuts or extra paper.
- 0. Prepare the rectangle
- 1. Crease the book hinge
- 2. Open the sheet
- 3. Rehearse the pocket fold
- 4. Reopen the apron
- 5. Apply three glue bands
- 6. Seal the two pockets
- 7. Close the bifold
- 8. Open and use the wallet
PREPARATION · Original measured two-pocket construction
Prepare the rectangle
Place the 8-inch edges horizontally, inside face up. Mark a horizontal line 3 inches above the bottom edge and a vertical line 4 inches from either side. The upper section will be the backing.
Layers: One continuous rectangle; do not cut the two marked lines.
Check: The lower apron is 3 inches high; the backing above it is 3.5 inches high.
Explore this step ↑STEP 1 · Original measured two-pocket construction
Crease the book hinge
Fold the right edge across to the left edge on the vertical center line. Press the crease.
Layers: Move the entire right half.
Check: All four outside corners align in pairs.
Explore this step ↑STEP 2 · Original measured two-pocket construction
Open the sheet
Unfold completely, keeping the inside face up.
Layers: Return the same right half.
Check: The sheet is flat with a vertical center crease.
Explore this step ↑STEP 3 · Original measured two-pocket construction
Rehearse the pocket fold
Fold the bottom edge upward on the line 3 inches above it. The free edge stops half an inch below the top edge. Crease firmly.
Layers: Move the entire 3-inch apron, across both halves.
Check: A half-inch backing strip remains visible above the pocket lip.
Explore this step ↑STEP 4 · Original measured two-pocket construction
Reopen the apron
Unfold the apron completely before applying glue. Leave the center crease in place.
Layers: Only the lower apron returns to the table.
Check: Both faces that will be glued are accessible.
Explore this step ↑STEP 5 · Original measured two-pocket construction
Apply three glue bands
On the backing, apply a thin layer of paper glue in three vertical bands: the leftmost quarter inch, the rightmost quarter inch, and a quarter-inch band centered on the book crease. Each band runs from the apron crease up 3 inches, ending half an inch below the top. Keep every other area dry.
Layers: Glue joins the backing to the apron; it is not another paper layer. The two broad dry rectangles become pocket interiors.
Check: The three bands are separate. No glue crosses either open pocket mouth.
Explore this step ↑STEP 6 · Original measured two-pocket construction
Seal the two pockets
Raise the apron on its existing crease. Press only over the three glue bands, then let the glue dry fully according to its instructions. Do not slide anything into wet pockets.
Layers: The full apron lands against the backing. Each side band closes an outside edge; the middle band separates the pockets.
Check: Two dry interiors remain, each 3.625 inches wide and 3 inches deep, with an unglued opening at the top.
Explore this step ↑STEP 7 · Original measured two-pocket construction
Close the bifold
When the glue is dry, fold the right panel left on the center crease. Keep both pocket walls together.
Layers: Move the backing and apron of the right pocket as one joined packet.
Check: The closed wallet measures 4 × 3.5 inches, with the pockets facing inward.
Explore this step ↑STEP 8 · Original measured two-pocket construction
Open and use the wallet
Open the right panel about two thirds of the way back, like a book. Fold a bill in half across its length and gently slip it into either top opening. A half-folded US bill is about 3.07 × 2.61 inches; check other currencies against the pocket dimensions. Do not force a stack.
Layers: Both walls and all three joined seams stay together. Bill insertion is a use instruction, not a simulated fold.
Check: There are two separate pockets and a working center hinge; the holder has no lid or locking tuck.
Explore this step ↑
Sources & notes
Original construction and teaching by Just Fold Paper, Original two-pocket glued bifold (2026).
Original measured construction ↗
This measured construction, English instructions, geometry and diagrams were authored for Just Fold Paper. No outside photographs, diagram artwork or tutorial wording are reproduced. Original here describes this authored layout, not a claim to have invented paper wallets or adhesive pockets.
Adaptation: One rectangular sheet has a 3-inch apron folded onto a 3.5-inch backing. Three 0.25-inch-wide adhesive bands join the apron to the backing at both side edges and across the middle. This makes two distinct pockets, each with 3.625 inches of clear width and 3 inches of depth. A vertical center crease makes the two-panel bifold. Unlike the card folder, there is no outside closing lid; unlike the envelope, there is no tuck. Bills are separate inserts and must be folded in half. No insertion or glue-fluid physics is simulated.
Original instructions and diagrams, made with AI assistance. About & reuse
Accuracy notes
Real-paper follow-along and paper weight have not been tested. Diagrams illustrate the sequence, not paper thickness, contact, collisions or exact layer visibility. The existing rigid-panel adapter carries both pocket walls together during the center fold. Adhesive bands are explicitly located and their joined material pairs are checked after closure; the open pocket interiors are not glued. Zero-thickness diagrams do not model adhesive strength, finite paper thickness, opening the pocket walls or inserting money. Real-paper folding and retention have not been tested. Try scrap paper first; this is a light paper holder, not a durable valuables wallet.