 Just Fold Paper
Fold only
Flat Origami Pudding
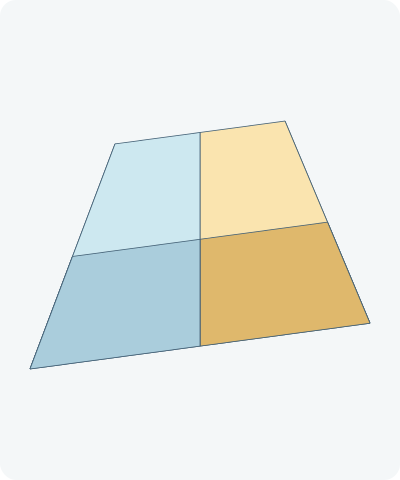
Fold a flat pudding picture from one square. A broad turned-up band reveals the reverse paper color, and two sloping folds behind make the dessert wider at its base.
Preparation + 7 numbered steps
Materials
6-inch square · 6 × 6 inches
One 6 × 6-inch square (15.24 × 15.24 cm), ideally with contrasting colors on its two sides. Brown and cream make a caramel-and-custard effect. Ruler and pencil for the marked folds. No cuts or glue.
Drag to rotate · swipe sideways on touch.
Arrow keys rotate when focused.
Follow along
PreparationThe interactive guide needs JavaScript. Read every illustrated step below.
Help · controls & diagram
Play or drag the progress slider to watch a fold from 0% to 100%. Use the view buttons or drag the diagram to look from another angle.
Blue and gold track the original left and right halves, not the literal colors of your paper. Darker shades indicate reverse faces. Orange marks the moving packet and its crease.
With the diagram focused: Space plays or pauses, ←/→ change steps, and Home resets.
Every step, at a glance
Compare your paper with each diagram after completing the action. Blue and gold track the original left and right halves, not the literal colors of your paper. Darker shades indicate reverse faces. Orange marks the moving packet and its crease.
- 0. Prepare the square
- 1. Crease the vertical center
- 2. Open the square
- 3. Crease the horizontal center
- 4. Open the center guides
- 5. Raise the broad color band
- 6. Taper the right side behind
- 7. Taper the left side and finish
PREPARATION · Origami Club Pudding
Prepare the square
Place the square with level edges and the intended upper pudding color facing up. The reverse color will become the lower band.
Layers: Use one ready-made square. No cutting is needed.
Check: All four corners are square.
Explore this step ↑STEP 1 · Origami Club Pudding
Crease the vertical center
Bring the right edge to the left edge and match the corners. Press the center crease.
Layers: Move the full right half.
Check: The vertical crease divides the square equally.
Explore this step ↑STEP 2 · Origami Club Pudding
Open the square
Return the right half completely to the table.
Layers: Open the same half.
Check: The original full square is restored.
Explore this step ↑STEP 3 · Origami Club Pudding
Crease the horizontal center
Bring the bottom edge to the top edge. Match the corners and press.
Layers: Move the full lower half.
Check: The two center creases cross at the middle.
Explore this step ↑STEP 4 · Origami Club Pudding
Open the center guides
Lower the folded half completely. Keep both guide creases.
Layers: Open the same lower half.
Check: The sheet is flat again, with a visible cross.
Explore this step ↑STEP 5 · Origami Club Pudding
Raise the broad color band
Measure 2 inches (5.08 cm) up from the bottom edge and mark a horizontal line. Fold the bottom edge upward on this line. It lands 1 inch above the original horizontal center crease.
Layers: Move the lower third of the sheet onto the front.
Check: The shortened rectangle has two equally tall visible color bands.
Explore this step ↑STEP 6 · Origami Club Pudding
Taper the right side behind
On the original top edge, mark a point 1.5 inches (3.81 cm) in from the right corner. Join this mark to the lower right corner of the shortened rectangle. Fold everything to the right of that sloping line behind.
Layers: Carry the entire right corner, including the part of the front band crossed by the crease.
Check: The right side slopes outward toward the base. The front band stays visible.
Explore this step ↑STEP 7 · Origami Club Pudding
Taper the left side and finish
Mark the matching point 1.5 inches in from the upper left corner. Join it to the lower left corner and fold the whole outside packet behind. Smooth the finished pudding flat.
Layers: Carry both the backing and the band in the left corner. Keep the right side folded.
Check: The top is 3 inches wide, the base is 6 inches wide, and the color boundary is level.
Explore this step ↑
Sources & notes
Origami Club; diagram copyright credit: Fumiaki Shingu, Pudding (undated web diagram).
The source diagram credits Fumiaki Shingu. Diagram copyright credit does not establish the model designer or a design-reuse license. This guide does not label the design traditional or public domain. Source media and wording are not reproduced; the instructions, geometry, SVG diagrams and PDF here are original.
Adaptation: The source first divides a larger sheet into four separate squares. This guide starts with one ready-made 6-inch square instead: no cutting or joined pieces. The source shows center guides; they are taught as separate folds and full reopening. The lower fold is fixed at one third of the square height. Each side hinge joins a bottom corner of the shortened rectangle to a point one quarter of the original width from the corresponding top corner. These exact ruler landmarks are authored choices for the unmeasured dotted lines. The contrasting band remains on the front; every side packet folds behind. This is the simple flat pudding without a separate plate, not the different Creme Caramel dish construction.
Original instructions and diagrams, made with AI assistance. About & reuse
Accuracy notes
Real-paper follow-along and paper weight have not been tested. Diagrams illustrate the sequence, not paper thickness, contact, collisions or exact layer visibility. One connected 36-square-inch sheet. The two side folds carry both the backing and the overlapping band material where their hinges cross it. Zero-thickness diagrams do not simulate paper thickness or contact forces. Real-paper folding and printing have not been tested.